

An outdoor sauna with changing room transforms a simple backyard heat cabin into a complete wellness retreat. The changing room creates a dedicated transition space where you can undress, store clothing and cool down in privacy before stepping back outside. For North American homeowners who sauna year-round, this extra room becomes essential when snow covers the deck or guests arrive together. Understanding how a changing room fits into your outdoor sauna layout, which materials work best and how to size the space for real-world use will help you choose a configuration that delivers authentic Finnish sauna comfort without compromise.
Why a Changing Room Matters in an Outdoor Sauna
In Finland, a separate changing space is standard in public saunas and many private cottages. It respects the rhythm of sauna bathing: arrive, undress in calm privacy, enter the hot room with focus, exit to cool, then return to the changing area to dress. When your sauna sits outdoors, especially during Canadian winters or rainy Pacific Northwest evenings, this buffer zone becomes practical rather than optional.
A dedicated changing room serves four core functions:
- Privacy: Guests can arrive dressed, change without stepping back into the house and leave without tracking wet footprints indoors.
- Climate buffer: In winter, the changing room shields you from freezing air between the hot room and your back door, reducing shock and preserving heat.
- Storage and preparation: Hooks, a bench and a small shelf keep robes, towels and fresh clothes organized, dry and ready.
- Social flexibility: When multiple bathers use the sauna together, the changing room lets one person cool down while another prepares to enter.
Without this space, you must dash indoors or change in the open, which interrupts the ritual and often feels rushed. For homeowners comparing square outdoor sauna models, the presence or absence of a changing room becomes one of the clearest layout decisions.
Outdoor Sauna with Changing Room Layout Options
Changing rooms typically occupy between 0.7 m and 1.2 m of total footprint, extending the sauna length or width depending on the architectural design. The most common North American layout places the changing room at the front or side, separated from the hot room by a glass or solid wood door.
Inline extension (front or rear)
In this configuration, the changing room sits at one end of the sauna, creating a straight path: entry door → changing space → interior door → hot room. This layout works well on narrow lots and keeps the building footprint rectangular. The interior glass door preserves sightlines and natural light while maintaining thermal separation.
Side-by-side configuration
Some models position the changing room and hot room side by side, sharing a common wall. You enter the changing area directly from outside, then step laterally into the sauna. This design can reduce total building length but may require a wider footprint.
Integrated porch versus enclosed room
A few outdoor saunas offer a covered porch instead of a fully enclosed changing room. The porch provides shelter and a bench but no walls, which limits privacy and climate protection. For serious year-round use, a fully enclosed changing room with its own door and ventilation delivers better performance.
| Layout Type | Footprint Impact | Privacy | Winter Performance | Best For |
|---|---|---|---|---|
| Inline extension | Adds 0.7–1.2 m length | Excellent | Excellent | Narrow lots, year-round use |
| Side-by-side | Adds width, reduces length | Excellent | Excellent | Wide lots, flexible access |
| Covered porch | Minimal | Moderate | Poor | Mild climates, solo use |
| No changing room | None | Minimal | Poor | Tight budgets, indoor access nearby |
Sizing Your Changing Room
A functional changing room measures at least 0.7 m deep × the full width of the sauna. This provides enough floor area for one person to stand, turn and sit on a bench. For households where two people often sauna together, a 1.0 m depth offers more comfort and eliminates bottleneck moments.
Critical dimensions to confirm:
- Bench depth: 30–40 cm allows comfortable sitting to remove shoes and socks.
- Door clearance: The entry door should swing outward or slide to avoid consuming precious floor space inside the changing room.
- Hook spacing: Plan for at least two coat hooks mounted 150–165 cm high, positioned so robes and towels do not touch.
- Headroom: Maintain the same interior ceiling height as the hot room (typically 200–210 cm) to avoid a cramped feeling.
When comparing models, measure the changing-room footprint independently from the hot room. A sauna advertised as "3.0 m × 2.3 m with changing room" may allocate 1.0 m to the changing area, leaving 2.0 m × 2.3 m for the actual hot room and benches. Verify the hot-room dimensions match your bather capacity and sauna space expectations.
Materials and Construction for Changing Rooms
The changing room shares the same wall assembly as the hot room but experiences much lower heat and humidity. This difference influences interior cladding, insulation strategy and moisture management.
Wall and ceiling materials
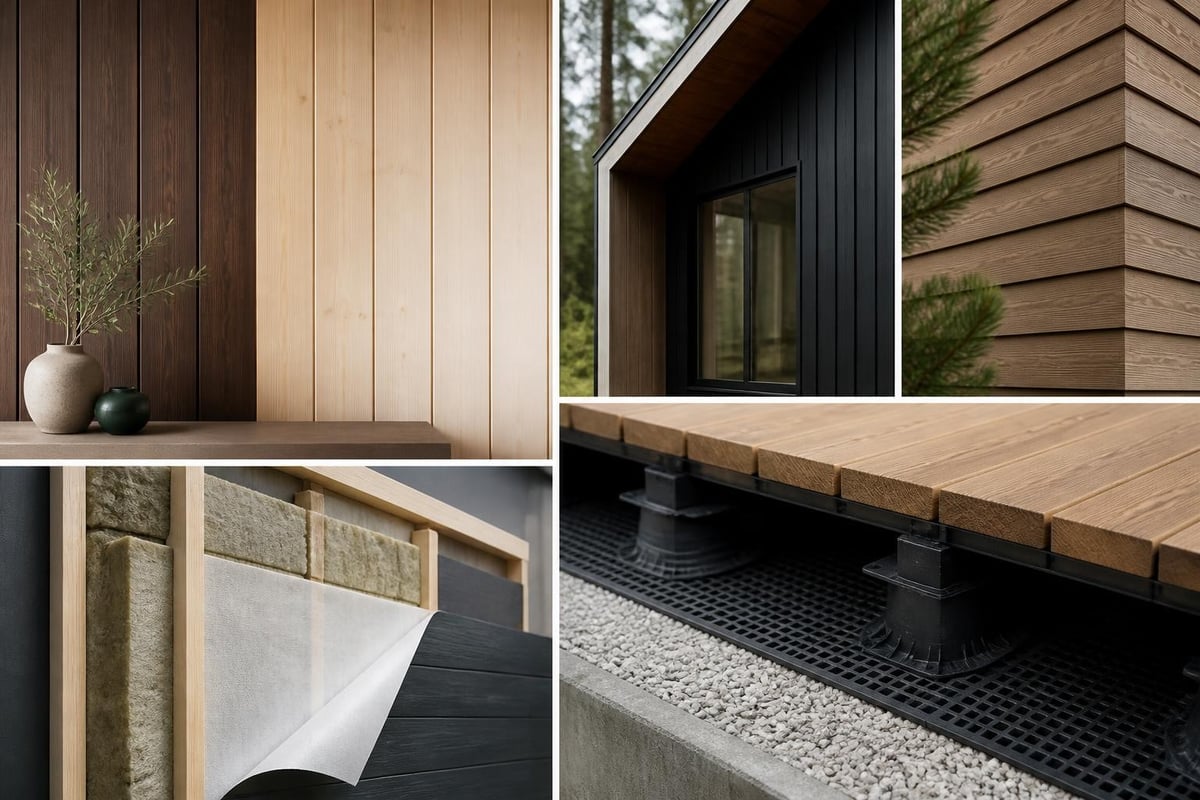
Thermowood or Nordic Pine remains the standard choice for interior walls in both the changing room and hot room. Thermowood's dimensional stability and low moisture absorption make it ideal for the transition zone, where condensation can form when cold outdoor air meets warm, humid air exiting the sauna. Nordic Pine offers a lighter appearance and pleasant aroma but requires careful ventilation to prevent mold in damp climates.
For exterior cladding, both materials perform well when properly finished and maintained. Thermowood naturally resists rot and can be left untreated to weather to a silver-gray patina. Nordic Pine benefits from a UV-protective wood oil or stain, especially in direct sun. Follow USDA Forest Products Laboratory technical guidance on Western redcedar and other exterior woods for comparative durability data and finish recommendations.
Insulation and vapor control
Because the changing room stays cooler than the hot room, you can use lighter insulation (R-13 to R-19 in walls, R-30 in the ceiling) compared to the R-21+ typically installed in sauna walls. However, vapor control remains critical. Moisture migrating from the hot room or carried on wet skin can condense inside wall cavities if not properly managed.
Install a continuous air barrier on the warm side of the insulation and ensure all seams, penetrations and door frames are sealed. The Building Science Corporation moisture control digest provides detailed assembly drawings and vapor-control strategies for high-moisture spaces. Proper ventilation (discussed below) completes the moisture-management system.
Flooring
Changing-room floors must drain water and resist rot. Common options include:
- Slatted wood decking (outdoor-grade cedar, Thermowood or composite) over a sloped subfloor that drains away from the building
- Concrete or paver base with a slight pitch, left exposed or covered with removable wood duckboards
- Tile or stone over a waterproof membrane, grouted with epoxy grout for longevity
Avoid carpet, vinyl or sealed hardwood. Snow, rain and wet feet will track water into the changing room, and any non-draining surface will stay damp, promoting mold and odor.
Ventilation and Climate Control
The changing room requires its own ventilation strategy, distinct from the hot room. In the hot room, air enters low near the heater and exits high near the ceiling, creating convection that circulates heat. The changing room needs steady air exchange to expel humidity and odors without creating drafts.
Passive ventilation
Install one or two adjustable soffit vents near the floor on opposite walls to promote cross-ventilation. A passive vent or small gable vent near the ceiling allows warm, moist air to escape by natural convection. This approach works well in temperate climates and for occasional use.
Mechanical ventilation
In humid regions or year-round installations, add a small exhaust fan (rated for wet locations) controlled by a timer or humidity sensor. The fan pulls moist air out of the changing room and prevents condensation on walls and ceilings. Follow ASHRAE ventilation guidance for recommended air-change rates in high-moisture support spaces (typically 6–8 air changes per hour for changing rooms).
Heating the changing room
Some homeowners add a small electric radiant panel or infrared heater to the changing room for winter comfort. This is optional but appreciated when outdoor temperatures drop below freezing. Keep the changing room at 15–18°C (60–65°F) for comfort; higher temperatures waste energy and increase condensation risk when the door opens.
Door and Window Placement
The changing room typically has two doors: an exterior entry door and an interior door separating it from the hot room.
Exterior entry door: Choose a solid wood or insulated fiberglass door with weatherstripping. The door should swing outward to maximize interior floor space and provide emergency egress. Tinted or frosted glass panels add natural light while preserving privacy.
Interior hot-room door: A tempered glass door is standard. It allows visual connection between spaces, admits daylight from the sauna's exterior windows into the changing room and signals when the sauna is occupied. The glass should be clear or lightly tinted; avoid frosted glass, which blocks too much light.
Windows: Adding a small window (fixed or operable) in the changing-room wall improves daylight and ventilation. Position it high (140–160 cm) to maintain privacy. Tinted or frosted glass balances light and discretion. If the changing room faces a neighbor's yard or public pathway, skip the window or install interior blinds.
For accessibility considerations, including door widths, thresholds and clear floor space, consult the U.S. Access Board's guidance on saunas and steam rooms.
Bench, Hooks and Storage Details
A well-designed changing room includes a bench, hooks and a small shelf, all built from rot-resistant materials.
Bench design
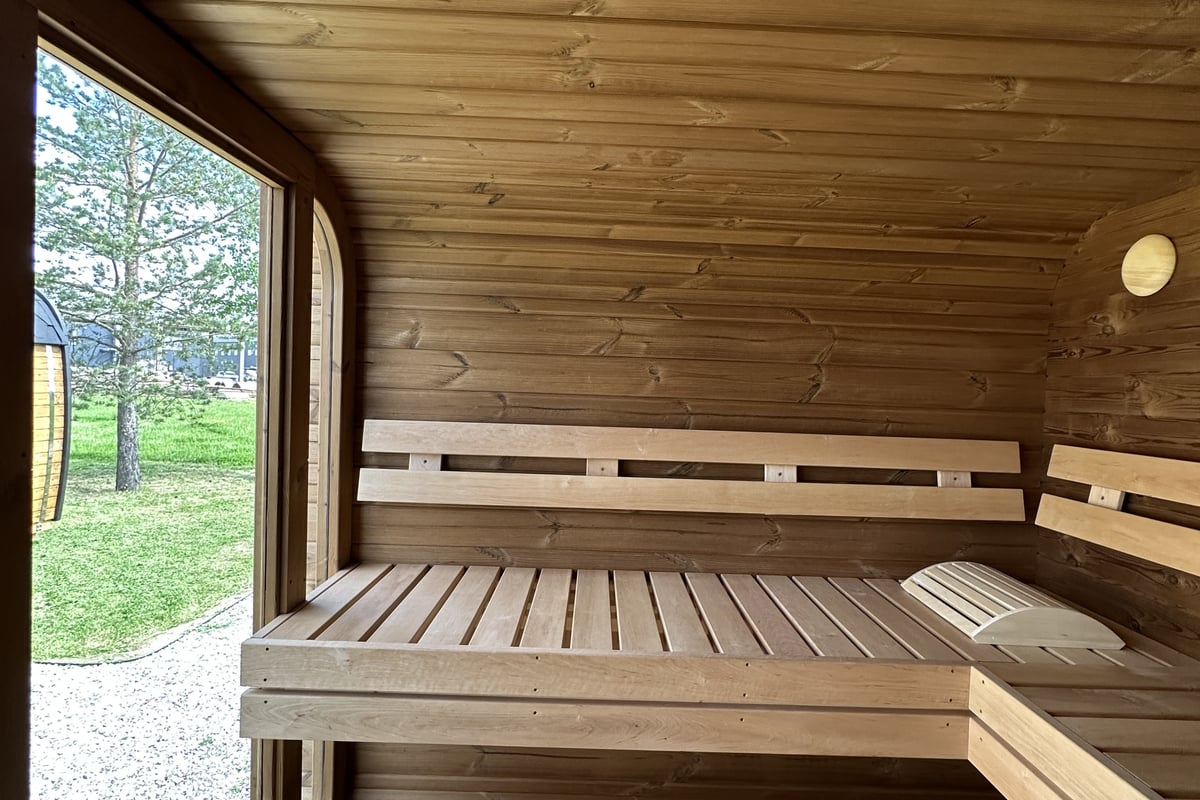
Mount a fixed bench along one wall, 40–45 cm deep and 45–50 cm high. Black Alder, Aspen or Thermowood are ideal; they stay cool to the touch, resist moisture and match the sauna's interior aesthetic. The bench should support at least 135 kg per seat position. Secure it to wall studs with stainless-steel or coated screws.
Hooks and hanging storage
Install four to six hooks at two heights: 150–165 cm for robes and jackets, 120–130 cm for towels. Space hooks 20–25 cm apart to prevent items from touching. Stainless-steel or brass hooks resist corrosion and complement Nordic design.
Shelf and cubbies
A small shelf (20–25 cm deep, mounted 100–110 cm high) provides a landing spot for phones, glasses and keys. Some builders add open cubbies below the bench for slippers or sauna buckets. Avoid closed cabinets, which trap moisture and reduce air circulation.
Outdoor Sauna with Changing Room Model Comparison
When evaluating outdoor sauna models, compare the changing-room footprint, door configuration, included furnishings and material quality. The table below illustrates typical specifications for sauna models that include a dedicated changing room.
| Feature | Entry Model | Mid-Range Model | Premium Model |
|---|---|---|---|
| Changing-room depth | 0.7 m | 0.9 m | 1.0–1.2 m |
| Wall thickness | 38 mm | 44 mm | 46 mm |
| Interior door | Solid wood | Tempered glass | Tempered glass, premium frame |
| Bench included | Yes, basic pine | Yes, Aspen or Alder | Yes, Aspen or Alder, ergonomic depth |
| Hooks and shelf | 2 hooks | 4 hooks, 1 shelf | 6 hooks, shelf, optional cubbies |
| Exterior finish | Untreated or basic stain | UV oil, choice of tones | Thermowood, factory-finished |
The RecoSauna Comfort Square Sauna 3.0 × 2.3 m in Thermowood exemplifies a premium approach: it dedicates a full 1.0 m to the changing room, includes a Black Alder or Aspen bench, an internal tempered glass door and four tinted front windows. This configuration gives you 2.0 m × 2.3 m of hot-room space (comfortably seating four to six bathers) plus a private, well-lit changing area that functions year-round. The 46 mm solid Thermowood walls ensure durability in harsh North American winters, and the clean Scandinavian architecture integrates seamlessly into modern backyards. The model is compatible with both electric and wood-burning heaters, sold separately, so you can tailor heating to your preference and local code.
Installation and Site Preparation
Adding a changing room increases the outdoor sauna's overall footprint, which can affect site preparation, foundation design and permitting requirements.
Foundation and drainage
The changing room shares the same foundation as the hot room, typically a poured concrete slab, concrete pier system or gravel pad with perimeter timbers. Because the changing room floor will get wet, slope the foundation 1–2% away from the building to promote drainage. If you install a wood-slat floor, leave 10–15 mm gaps between boards and ensure the subfloor drains freely.
For sloped or uneven sites, a pier-and-beam foundation raises the sauna above grade and simplifies drainage. Consult local frost-depth requirements and adjust pier depth accordingly.
Setback and zoning
Many jurisdictions classify an outdoor sauna as an accessory structure, subject to setback rules (often 1.5–3 m from property lines) and maximum-size limits (commonly 120–200 sq ft without a permit). A sauna with a changing room may exceed the no-permit threshold, triggering plan review and inspection.
For example, Seattle's guidance on small outbuildings notes that structures over 200 sq ft require a building permit, electrical permit and compliance with zoning setbacks. Verify your local code before finalizing your layout. The Finnish Sauna Association's guide to building saunas offers traditional siting and foundation advice from a European perspective, useful for understanding design principles even when code requirements differ.
Electrical and heater clearances
Electric heaters must meet manufacturer clearances and local code. Typical requirements include:
- 150 mm minimum from combustible walls (more if not protected by heat shields)
- Dedicated 240 V circuit with GFCI protection
- Listed and labeled equipment installed per instructions
If you install a wood-burning heater, ensure the flue penetrates the roof with proper flashing and clearances, and that the firebox sits on a noncombustible hearth extending at least 450 mm in front. The Hamilton, MA inspector guidance provides a practical example of local code language around heater clearances and listed equipment.
Because the changing room does not contain the heater, it requires only lighting circuits (typically 120 V, GFCI-protected if outdoors or in wet locations) and optional circuits for a ventilation fan or small heater.
Using Your Changing Room Effectively
Once your outdoor sauna with changing room is installed, a few simple practices will maximize comfort and longevity.
Before bathing:
- Arrive with a towel, robe and fresh clothes. Hang the robe on a hook at chest height, fold clothes on the bench or shelf.
- Remove shoes and socks in the changing room to keep the hot-room floor clean.
- If you plan multiple rounds, leave a second towel in the changing room for cooling between sessions.
Between bathing rounds:
- Exit the hot room, close the interior glass door and sit on the changing-room bench to cool gradually. This avoids the shock of stepping directly outdoors in winter.
- Towel off excess moisture to reduce humidity buildup. Open a vent or crack the exterior door if condensation appears on walls.
- When ready, step outside for fresh air or a cold plunge, then return to the changing room before re-entering the hot room.
After bathing:
- Dry thoroughly in the changing room, especially your feet, to prevent tracking water indoors.
- Hang wet towels on hooks to air-dry, or bring them inside if you won't use the sauna for several days.
- Leave the exterior and interior doors slightly ajar (if secure) to promote airflow and dry the space completely.
For homeowners planning a sauna for recovery routine, the changing room becomes part of the contrast-therapy workflow: sauna → changing-room cooling → cold plunge → changing-room rest → second sauna round. This rhythm mirrors authentic Finnish practice and maximizes cardiovascular and metabolic benefits documented in recent systematic reviews of passive heat therapy.
Design Aesthetics and Landscaping Integration
An outdoor sauna with changing room occupies more visual space than a simple cabin, so thoughtful design and landscaping ensure it enhances rather than overwhelms your backyard.
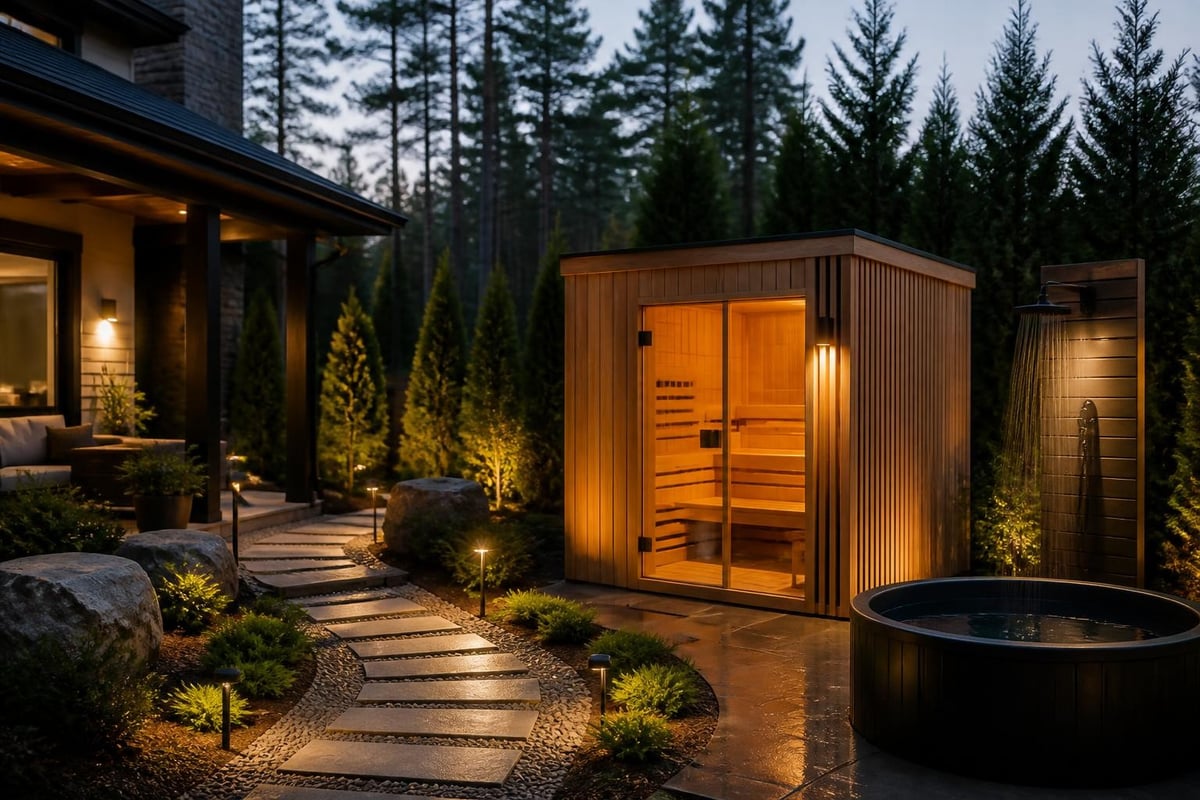
Architectural harmony: Choose a sauna design that echoes your home's style. Scandinavian square saunas with clean lines, tinted windows and natural wood tones blend well with contemporary, mid-century and Pacific Northwest architecture. Thermowood's dark, weathered finish complements stone, concrete and native plantings.
Screening and privacy: Plant evergreen shrubs (such as boxwood, arborvitae or laurel) or install slatted cedar fencing around the changing-room entrance to create a private courtyard feel. A gravel or stone path from your back door to the sauna entry defines circulation and reduces mud.
Lighting: Install low-voltage landscape lighting along the path and a wall-mounted fixture above the changing-room door. Inside, a single LED ceiling fixture (rated for damp locations, 3000 K warm white) provides sufficient light. Avoid bright, cool-white LEDs, which feel clinical and clash with the sauna's natural materials.
Outdoor shower integration: If space and budget allow, position an outdoor shower adjacent to the changing room. This supports the traditional Finnish cooling routine and reduces the need to return indoors between sauna rounds. A simple cold-water shower with a privacy screen and gravel drain suffices; heated outdoor showers are a luxury addition.
Some homeowners extend the changing room with a small covered deck or integrate it into a larger wellness pavilion. If you're designing a custom home cinema or entertainment space with ANR media, consider how sauna, cold plunge and outdoor relaxation zones work together to create a complete backyard retreat.
Maintenance and Seasonal Care
The changing room requires less intensive maintenance than the hot room but still benefits from regular attention.
Weekly:
- Sweep or vacuum the floor to remove dirt, leaves and tracked debris.
- Wipe down the bench with a damp cloth if sweat or body oils accumulate.
- Check door weatherstripping for gaps; cold drafts indicate a seal failure.
Monthly:
- Inspect hooks, shelves and bench fasteners for corrosion or loosening. Tighten or replace as needed.
- Verify that vents and exhaust fans (if installed) are clear of obstructions.
- Look for condensation stains or mold on walls and ceilings. If present, increase ventilation and reduce changing-room humidity.
Seasonally:
- In spring, check the exterior door and window seals, re-caulk if necessary.
- In fall, clear leaves and debris from the foundation perimeter and any drainage channels.
- Apply wood oil or UV protectant to Nordic Pine exteriors every 1–2 years. Thermowood can be left natural or oiled to preserve its original tone.
Winter considerations:
- Keep a rubber mat or boot tray in the changing room to capture snow and ice.
- If the changing room is unheated, allow extra time for the space to warm after you start the sauna.
- In very cold climates (below -20°C), consider a small radiant panel heater on a timer to prevent frost inside the changing room.
By treating the changing room as part of your sauna system rather than an afterthought, you extend the life of materials and maintain a pleasant, dry environment for year-round use.
Comparing Hot-Room Configurations with and without Changing Rooms
Not every outdoor sauna needs a changing room. Solo users who access the sauna from an adjacent mudroom or enclosed porch may find the extra footprint unnecessary. However, for most North American households, the added privacy, climate buffer and storage justify the modest increase in size and cost.
When a changing room is worth it:
- You sauna with family or guests and value privacy during transitions
- Your backyard sauna is distant from the house (more than 10 m)
- You live in a cold or wet climate and want to avoid outdoor dressing in winter
- You plan to integrate cold plunge or outdoor shower into a multi-step wellness routine
- You host sauna evenings and want a professional, spa-like experience
When you can skip the changing room:
- You're a solo bather with direct indoor access
- Your lot is very small and every square meter counts
- Your budget is tight and you prioritize a larger hot room over a changing area
- You sauna only in summer and don't mind changing outdoors or in the house
If you're uncertain, consider starting with a model that includes a changing room. It's far easier to add storage, hooks and a bench to an existing space than to expand the footprint later. The Whole Building Design Guide's design requirements for changing and locker rooms offer detailed space-planning criteria, clearances and hygiene provisions if you're designing a custom sauna or adding ADA-accessible features.
Long-Term Value and Resale Considerations
An outdoor sauna with changing room represents a significant investment, typically adding $12,000–$25,000 to your property depending on size, materials and heater choice. When properly installed and maintained, it can enhance resale value, especially in markets where wellness amenities and outdoor living spaces command premium prices.
Factors that maximize long-term value:
- Quality materials: Thermowood, tempered glass doors and marine-grade fasteners outlast budget alternatives and signal craftsmanship to buyers.
- Integrated design: A sauna that looks intentional-matching your home's architecture, sited thoughtfully and landscaped professionally-reads as a curated amenity rather than an afterthought shed.
- Permits and documentation: Buyers appreciate a permitted, code-compliant installation with clear maintenance records and warranty information.
- Flexible heating: Offering both electric and wood-burning heater compatibility appeals to a broader range of future owners.
In wellness-focused communities and colder climates (Pacific Northwest, Upper Midwest, mountain towns), outdoor saunas with changing rooms are increasingly expected in higher-end homes. In milder regions, they remain a distinctive feature that differentiates your property from comparable listings. For insights on authentic Finnish sauna culture and how it influences design expectations, explore the hot sauna traditions that shape modern North American installations.
An outdoor sauna with changing room delivers privacy, climate protection and a complete bathing ritual that honors authentic Finnish traditions while adapting to North American backyards and weather. Whether you prioritize winter performance, guest hosting or simply prefer unhurried transitions, the dedicated changing space transforms your sauna from a heat cabin into a true wellness retreat. RecoSauna helps you compare layouts, materials and bench configurations so you can confidently choose the outdoor sauna setup that fits your property, climate and lifestyle.
Share:
6 Person Outdoor Sauna: Size, Layout & Model Guide 2026
Thermowood Sauna: Why Finnish Builders Choose This Material