

A custom sauna represents more than adding a wellness structure to your property. It's about creating a personal retreat that fits your space, climate, lifestyle and how you want to experience löyly. Whether you're drawn to a compact two-person enclosure on a city patio or a spacious family sauna with a changing room and terrace, the planning decisions you make now will shape your sauna experience for decades. Understanding the trade-offs between fully custom builds, semi-custom options and configurable prefabricated models helps you invest wisely and avoid common regrets.
Understanding Custom Sauna Build Approaches
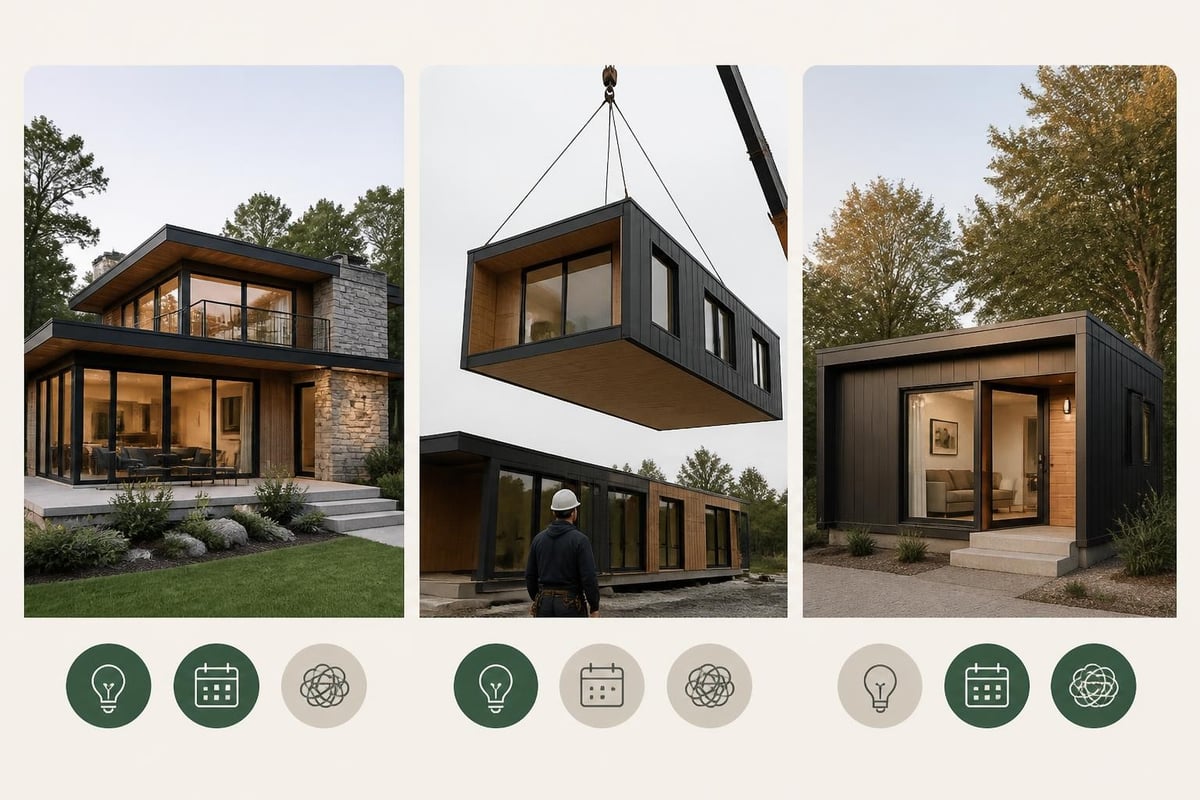
The term "custom sauna" means different things depending on who you ask. At one end sits the fully bespoke approach: hiring a carpenter or contractor to design and build a one-off structure from scratch. At the other end are modular prefab saunas that offer customization through material choice, bench layout, window placement and heater type.
Fully custom builds give you complete control over dimensions, materials, door placement, window size and interior details. You can match your home's architecture, work around site constraints and incorporate unusual features. The trade-off is time, cost and complexity. You'll need architectural drawings, building permits, a general contractor or skilled carpenter, and careful coordination of framing, insulation, vapor barrier, electrical and finish work.
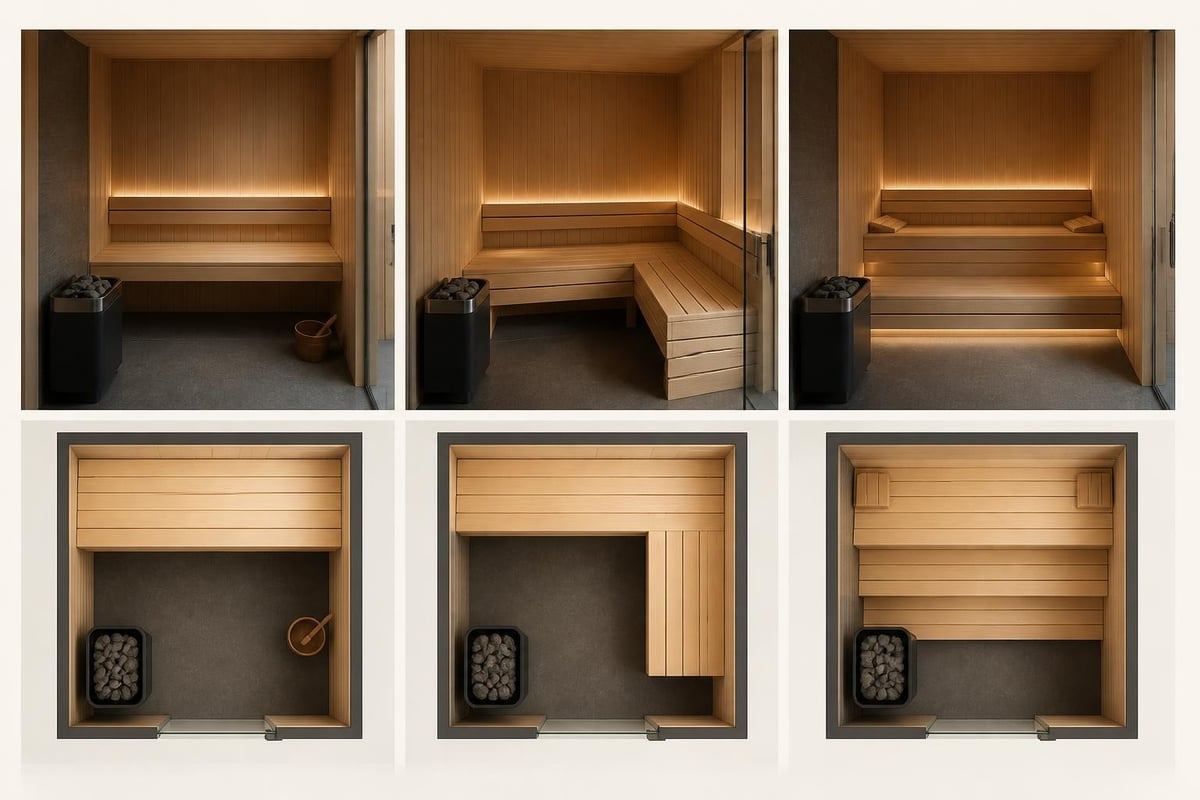
Semi-custom prefab models offer a middle path. You select from a range of sizes, then configure materials (Thermowood vs Nordic Pine), bench layouts (straight, L-shaped or tiered), window options and heater type. Panel-based kits arrive pre-cut with detailed assembly instructions. You're working within a proven design framework, but you retain meaningful choices that affect aesthetics, capacity and performance.
| Build approach | Design freedom | Lead time | Complexity | Typical cost range |
|---|---|---|---|---|
| Fully custom | Maximum | 3–6 months | High | Check local builders |
| Semi-custom prefab | High (within model range) | 4–12 weeks | Moderate | Varies by size/materials |
| Fixed prefab | Low (as-is only) | 2–8 weeks | Low | Varies by size/materials |
For most North American homeowners, a semi-custom approach delivers the best balance. You benefit from engineered designs, tested materials and factory precision, while still tailoring the sauna to your needs.
Material Selection for Exterior and Interior
Material choice defines how your custom sauna looks, performs and ages. Exterior cladding must withstand UV, rain, snow and temperature swings. Interior wood must handle high heat and humidity without warping, splintering or releasing resin.
Exterior Cladding
Thermowood is thermally modified Nordic Pine or Spruce, heat-treated to reduce moisture absorption and improve dimensional stability. It weathers to a silver-grey patina, requires no staining and resists rot and decay. Thermowood performs exceptionally well in climates with freeze-thaw cycles, heavy rain or high humidity. It's the premium choice for year-round outdoor saunas across North America.
Nordic Pine (untreated) offers a lighter, natural appearance and lower initial cost. It will weather to grey unless you maintain it with exterior stain or oil every 2–3 years. Pine performs well in dry climates and covered locations but requires more maintenance in wet or coastal regions.
Both materials are structurally sound when used in 46 mm solid-wall construction, a standard thickness for outdoor sauna panels. Applied Research Consortium studies on modified wood performance confirm that thermal modification significantly improves exterior durability.
Interior Wood
Black Alder and Aspen are the preferred choices for benches and interior surfaces. Both are low-density hardwoods with low thermal conductivity, meaning they stay cooler to the touch even at high sauna temperatures. They absorb moisture without excessive expansion and release it evenly, supporting good löyly.
Avoid softwoods like cedar or pine for benches. They can splinter, release sticky resin at high heat and feel uncomfortably hot on bare skin. Understanding wood-moisture relationships helps explain why hardwoods perform better in sauna interiors.
Layout, Size and Bench Configuration
Custom sauna planning starts with capacity and layout. How many people will use the sauna at once? Do you want a changing area? Will you install an outdoor shower or cold plunge nearby?
Sizing Guidelines
- 2-person sauna: 1.5 × 1.5 m to 2.0 × 2.0 m (5 × 5 ft to 6.5 × 6.5 ft)
- 2–4 person sauna: 2.3 × 2.3 m to 2.4 × 2.4 m (7.5 × 7.5 ft to 8 × 8 ft)
- 4–6 person sauna: 3.0 × 2.3 m or larger (10 × 7.5 ft or larger)
Larger saunas heat more slowly and require more powerful heaters, but they offer flexible seating arrangements and room to lie down. Smaller saunas heat quickly, use less energy and fit tighter sites.
Bench Layouts
Straight bench: runs along one wall, seats 2–3 comfortably, suits narrow layouts and simple installations.
L-shaped bench: wraps two walls, seats 4–6, allows face-to-face seating and better use of corner space.
Tiered bench: two or three levels along one wall, accommodates different heat preferences (higher = hotter) and supports lying down on the top tier.
Bench height and depth matter. The top tier should sit 90–100 cm (35–40 in) above the floor for proper heat exposure. Bench depth should be at least 50 cm (20 in) for sitting, 180 cm (70 in) for lying down.
Choosing Between Electric and Wood-Burning Heaters
Heater choice affects installation, operating cost, maintenance and sauna experience. Both deliver authentic heat when properly sized.
Electric Heaters
Electric heaters plug into a dedicated 240V circuit (in North America), heat quickly and require minimal maintenance. You control temperature precisely, and there's no need to source, store or haul firewood. Installation requires a licensed electrician to run a dedicated circuit per National Electrical Code standards and verify the heater meets UL 875 certification.
Electric heaters suit urban and suburban sites, HOA-restricted properties and users who value convenience. Expect 6–9 kW for a 2–4 person sauna, 9–12 kW for 4–6 people. The North American Sauna Society design guidelines recommend 1 kW per cubic meter of interior space as a starting point.
Wood-Burning Heaters
Wood-burning stoves create a different experience: slower warm-up, the ritual of fire-tending, the scent of wood smoke and a live flame. They require a chimney, roof penetration, exterior clearances and often a building permit. Wood heat appeals to rural properties, off-grid sites and sauna enthusiasts who value tradition.
Operating cost depends on local firewood prices. Maintenance includes ash removal, chimney cleaning and occasional gasket or baffle replacement.
| Heater type | Installation | Operating cost | Maintenance | Permit typically required |
|---|---|---|---|---|
| Electric | Dedicated 240V circuit | Electricity only | Minimal (stone cleaning) | Electrical permit |
| Wood | Chimney, roof penetration | Firewood cost | Moderate (ash, chimney) | Building + fire permits |
Most semi-custom prefab saunas are compatible with both heater types, so you can choose based on your site and preferences.
Ventilation and Air Distribution
Proper ventilation prevents stuffiness, extends material life and supports good löyly. Fresh air enters low (often under the heater or through a dedicated inlet), rises as it warms, circulates around bathers and exits through an adjustable vent near the ceiling on the opposite wall.
ASHRAE ventilation guidelines recommend 4–6 air changes per hour for comfort and indoor air quality. In practice, a passive inlet (10 × 10 cm or 4 × 4 in) and an adjustable upper vent work well for most residential saunas. The vent should never be fully closed during use.
Poor ventilation leads to uneven heat, condensation on walls and a heavy, uncomfortable atmosphere. Oversized or poorly placed vents cause drafts and rapid heat loss. Test and adjust vent position during your first few sessions.
Windows, Doors and Natural Light
Windows add natural light, visual connection to the outdoors and aesthetic appeal. Tinted or bronze-tinted tempered glass is standard. It reduces glare, hides condensation and complements Scandinavian design.
Too many or too-large windows increase heat loss and reduce bench space. Most custom saunas feature 2–4 small to medium windows on the front wall. Rear and side walls are typically solid for better heat retention and structural simplicity.
Sauna doors should open outward for safety and be fitted with a simple wooden or plastic handle (never metal, which gets too hot). Tempered glass doors are common in modern designs. They feel lighter, look clean and let in more light than solid wood doors.
Adding a Changing Room or Terrace
A changing room adds privacy, convenience and weather protection. You can undress, store towels and cool down without stepping outdoors. It's especially valuable in cold climates or when your sauna sits far from the house.
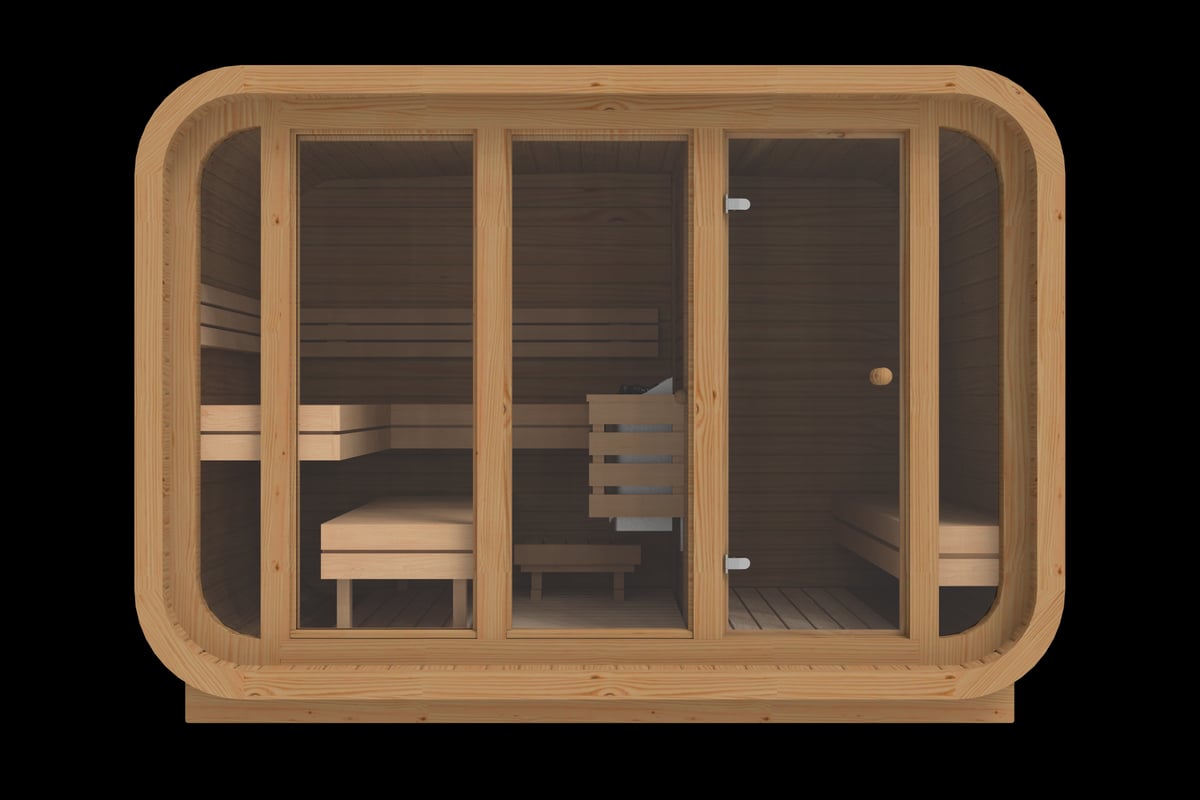
Changing rooms add 1–1.5 m (3–5 ft) to the overall footprint. They typically include a bench, hooks and interior lighting. The RecoSauna Comfort Square Sauna 3.0 × 2.3 m – Thermowood integrates a 1 m changing area with a dedicated bench and an internal glass door separating the changing room from the sauna chamber, creating a complete wellness retreat in a single structure.
A terrace extends the sauna experience outdoors. It provides space for an outdoor shower, seating, a cold plunge or simply a place to cool down and enjoy the air. Terraces are typically 1–2 m deep and run the width of the sauna. They require the same foundation prep as the sauna itself and add significantly to the backyard wellness atmosphere.
Foundation and Site Preparation
Every outdoor sauna needs a level, stable foundation. The foundation prevents settling, keeps the structure square and protects the floor from ground moisture.
Common foundation options:
- Concrete slab: most permanent and stable, suitable for all soil types, requires formwork and finishing
- Concrete piers with timber frame: cost-effective, allows airflow under the sauna, works well on sloped sites
- Gravel base with paving slabs: simple and affordable, suitable for firm, well-drained soil, less permanent
- Helical piles or deck blocks: fast installation, minimal excavation, good for rocky or uneven terrain
The foundation should extend slightly beyond the sauna footprint and slope gently away to drain water. Check local frost-depth requirements if you're in a cold climate. Foundations that sit above the frost line can heave and crack.
Most panel-based sauna kits include a floor section, so you're building on top of the foundation rather than integrating the floor into it. This simplifies installation and allows you to relocate the sauna later if needed.
Electrical, Lighting and Controls
If you're installing an electric heater, plan the electrical work early. A licensed electrician should run a dedicated 240V circuit from your main panel to the sauna location, install a disconnect switch near the sauna and wire the heater per manufacturer instructions and local code.
Interior lighting should be sauna-rated (heat and moisture resistant). LED fixtures are common, low-energy and long-lasting. Install lights away from the heater and high-heat zones. A simple on/off switch outside the sauna is standard; dimming is a nice upgrade.
Heater controls range from basic dial timers to digital panels with temperature displays and programmable settings. More complex controls don't necessarily improve the sauna experience, but they do add convenience if you want to pre-heat remotely or monitor temperature precisely.
All electrical components must meet National Electrical Code standards, and most jurisdictions require an electrical permit and inspection.
Insulation and Year-Round Performance
If you plan to use your custom sauna year-round, especially in cold climates, insulation makes a measurable difference. Insulated walls, roof and floor reduce heat-up time, lower operating costs and maintain more stable temperatures.
Standard outdoor saunas (non-insulated) have solid 46 mm walls. They work well in mild climates and during warmer months but lose heat quickly in sub-zero temperatures or high winds.
Insulated saunas add a layer of mineral wool or rigid foam insulation between an interior and exterior wall or above the ceiling. Insulated roofs are especially important, as heat rises and the roof sees the greatest temperature differential.
Insulation adds cost, complexity and weight but pays off if you're in a northern climate or want efficient winter use. If insulation isn't built into your prefab model, you can retrofit it during assembly or add it to a fully custom build.
Prefab Kits vs Fully Custom: Time and Cost Considerations
Fully custom saunas take longer and cost more than prefab kits, but they offer design freedom and can be tailored to unusual sites or specific architectural visions.
Typical timelines:
- Fully custom build: 3–6 month planning, permitting and construction
- Semi-custom prefab kit: 4–12 week lead time, 1–3 day assembly (DIY or contractor)
Cost drivers for custom builds:
- Design and engineering fees
- Framing materials and labor
- Insulation, vapor barrier and finish carpentry
- Electrical and heating installation
- Permits and inspections
- Roofing, windows and door fabrication
Prefab kits consolidate many of these costs into a single package price. You still need site prep, foundation, electrical work and possibly a building permit, but the sauna structure itself arrives as a complete, engineered system.
For most homeowners, a semi-custom prefab sauna from a manufacturer with proven designs, clear specifications and North American support delivers better value and less risk than a one-off build.
Integrating Cold Plunge and Outdoor Shower
The contrast between hot sauna and cold water is central to Finnish sauna culture. Adding a cold plunge or outdoor shower near your sauna enhances the experience and supports recovery.
Cold plunge options:
- Dedicated cold plunge tub: insulated, temperature-controlled, can chill water to 4–10°C (39–50°F)
- Stock tank or DIY plunge: affordable, simple, no chilling (water temperature depends on season and location)
- Natural water: lake, river or ocean access (if available and safe)
Outdoor showers are simpler and less expensive. A wall-mounted shower with hot and cold taps lets you rinse, cool down gradually or take a quick cold rinse between sauna rounds. Locate it on the terrace or adjacent to the sauna for easy access.
Plan plumbing and drainage during site prep. Cold plunge tubs and showers both require water supply and a drain or dry well. Check local codes for greywater discharge if you're not connected to municipal sewer.
Permits, Codes and Professional Help
Most municipalities classify outdoor saunas as accessory structures and require a building permit. Permit requirements vary by jurisdiction and depend on the sauna's size, foundation type and whether it includes electrical or plumbing.
Typical permit triggers:
- Structures over 10–15 m² (100–150 ft²)
- Permanent foundations (concrete slab or piers)
- Electrical work (dedicated circuits, heater installation)
- Plumbing (shower, cold plunge water supply)
Contact your local building department early. Ask about setbacks (distance from property lines and other structures), height limits, fire safety and electrical code compliance. Some jurisdictions have specific sauna regulations; others apply general accessory-building rules.
Hire a licensed electrician for all electrical work. Electrical permits and inspections are standard. DIY electrical work is illegal in most areas and voids manufacturer warranties.
If you're installing a wood-burning heater, you may need additional permits related to chimney installation, roof penetration and fire safety clearances.
Selecting a Manufacturer or Builder
If you're going the prefab route, research manufacturers carefully. Look for companies with transparent specifications, responsive support and a track record in North America.
Key questions to ask:
- What are the exact exterior dimensions, interior dimensions and ceiling height?
- What materials are used for walls, roof, floor, benches and trim?
- Is the model compatible with both electric and wood heaters?
- What's included in the kit? (floor, walls, roof, door, windows, benches, hardware)
- What's not included? (heater, stones, foundation, electrical)
- What's the lead time from order to delivery?
- Is assembly DIY-friendly, or do you recommend a contractor?
- What's the warranty on materials and structure?
Avoid manufacturers that make vague health claims, hide specifications or pressure you with fake urgency. A reputable company will give you clear answers, verified data and time to decide.
For fully custom builds, interview multiple builders or carpenters. Ask for references, photos of completed saunas and detailed quotes that break down materials, labor and timeline.
Maintenance and Long-Term Care
Custom saunas require surprisingly little maintenance if built well. The main tasks are cleaning, wood care and heater upkeep.
Routine maintenance:
- Benches and walls: wipe down after each use, deep clean monthly with sauna-safe cleaner
- Heater stones: rinse annually, replace cracked or crumbling stones
- Floor: sweep regularly, mop with mild cleaner as needed
- Exterior (Thermowood): no treatment required, will grey naturally; optional oil or stain if you prefer original color
- Exterior (Nordic Pine): re-stain or oil every 2–3 years to maintain appearance and weather resistance
Seasonal checks:
- Inspect door seals and hinges
- Check ventilation openings for blockages
- Verify electrical connections (if accessible)
- Clear leaves, snow or debris from roof and around foundation
- Test heater and controls before heavy-use season
Properly maintained, a well-built outdoor sauna will last 20–30 years or more. Thermowood exteriors and hardwood benches age gracefully with minimal intervention.
Common Custom Sauna Mistakes to Avoid
Even experienced builders and homeowners make mistakes when planning a custom sauna. Here are the most common regrets and how to avoid them.
Undersizing the heater. A too-small heater struggles to reach temperature, especially in cold weather or large saunas. Follow manufacturer guidelines and add 10–20% capacity if you're in a northern climate.
Skipping the changing room. Many buyers regret not including a changing area, especially in cold or rainy climates. It's much harder to add later than to build it in from the start.
Poor ventilation placement. Vents too high, too low or on the wrong wall create drafts or stuffiness. Follow proven designs or consult the North American Sauna Society guidelines.
Ignoring foundation drainage. Water pooling under or around the sauna leads to rot, mold and settling. Slope the ground away and use gravel or crushed stone for drainage.
Using the wrong interior wood. Cedar benches look nice but get too hot and release resin. Stick with Black Alder or Aspen for comfort and longevity.
Overcomplicating controls. Digital panels, remote apps and programmable settings add cost and failure points. Simple dial controls work just as well for most users.
Not planning for snow load. In northern climates, roofs must handle significant snow weight. Verify that your sauna's roof structure meets local snow-load requirements.
Final Considerations Before You Build
Before you commit to a custom sauna, walk through your backyard at different times of day. Where does the sun hit? Where's the best view? How far is it from the house, and will you use it in winter if it's a long walk?
Think about how you'll use the sauna. Solo sessions? Family bathing? Entertaining friends? Your usage pattern should guide size, layout and feature choices.
Consider future expansion. Will you add an outdoor shower, cold plunge or covered seating area later? Plan space and utilities accordingly.
Finally, set a realistic budget and timeline. Custom projects always take longer and cost more than expected. Build in contingency time and money, and don't rush decisions.
A well-planned custom sauna becomes a central part of your home wellness routine and a space you'll use for decades. Whether you choose a fully custom build or a configurable prefab model, the key is matching the sauna to your site, climate and how you want to experience authentic löyly. RecoSauna brings Finnish sauna expertise and proven Thermowood designs to North American backyards, helping you make informed choices about size, materials, layout and installation. Explore our Square Sauna collection and find the model that fits your vision.
Share:
Sauna Bag: Uses, Materials & What Buyers Should Know