

Installing an outdoor sauna in your North American backyard transforms your property into a year-round wellness retreat, but success depends on careful planning from the first site assessment through your inaugural sauna session. Whether you're setting up a compact two-person cabin or a spacious model with a dedicated changing room, understanding foundation requirements, electrical work, permit considerations and heater choices ensures your investment delivers authentic Finnish sauna experiences for decades. This guide walks you through every phase of outdoor sauna installation with the practical expertise gained from hundreds of installations across diverse climates and property types.
Site Selection and Preparation
Choosing the right location sets the foundation for everything that follows. Your site must balance accessibility, privacy, drainage and proximity to electrical service while respecting local setback requirements.
Start by mapping a level area at least one foot larger than your sauna footprint on all sides. This buffer accommodates foundation work, allows rainwater to drain away from walls and provides clearance for maintenance access.
Key site considerations:
- Distance from property lines (typically 3–10 feet minimum)
- Slope and natural drainage patterns
- Overhead clearance from tree branches and power lines
- Winter snow load and prevailing wind direction
- Proximity to your home's electrical panel
- Privacy from neighbors and street views
Natural slopes complicate foundation work and increase installation costs. If your preferred spot slopes more than six inches across the sauna footprint, plan for grading, retaining walls or a stepped foundation system.
Check local setback regulations before you commit. Many jurisdictions treat outdoor saunas as accessory structures subject to zoning rules similar to sheds or pool houses. The Oregon Building Codes Division's homeowner guide illustrates typical permit workflows, though your local requirements may differ.
Foundation Options for Different Climates
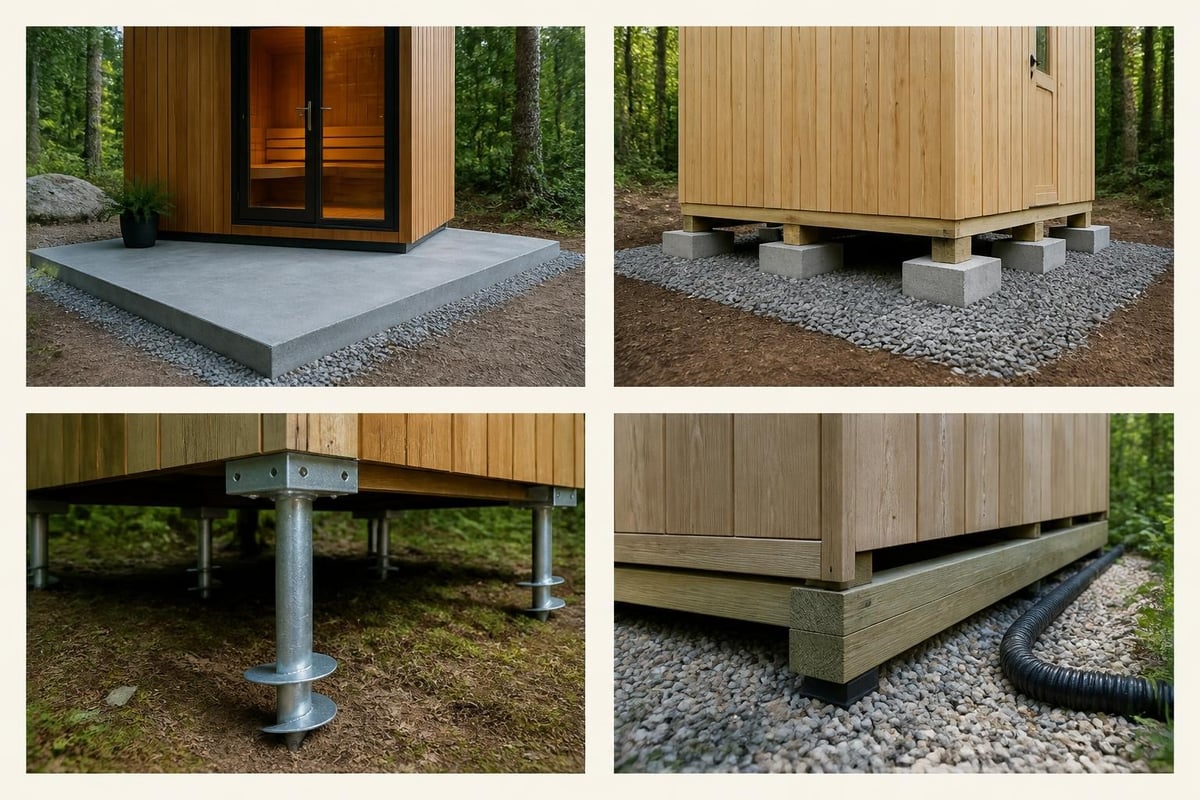
Your foundation must support several thousand pounds, resist frost heave in cold climates and remain level through seasonal soil movement. Four foundation types dominate outdoor sauna installation projects across North America.
| Foundation Type | Best For | Typical Cost | Installation Time |
|---|---|---|---|
| Concrete slab | Permanent installations, all climates | $$$ | 3–7 days |
| Deck blocks with gravel | Moderate climates, lower budgets | $ | 1–2 days |
| Helical piers | Frost-prone regions, uneven terrain | $$$ | 1–2 days |
| Pressure-treated skids | Temporary setups, rental properties | $$ | 1 day |
Concrete slabs offer unmatched stability and longevity. Pour a 4-inch slab with wire mesh reinforcement and extend it 6–12 inches beyond the sauna walls. In frost zones, the slab requires a thickened perimeter footing extending below your local frost line-often 36–48 inches in northern states and Canadian provinces.
Deck blocks rest on compacted gravel beds and work well where frost heave is minimal. Space blocks every 24–30 inches in both directions, verify level with a laser or water level and top with pressure-treated beams before setting your sauna.
Helical piers screw deep into stable soil below the frost line, making them ideal for Minnesota, Wisconsin, Michigan and most Canadian installations. A contractor can install 8–12 piers in a few hours, then cap them with a pressure-treated frame.
Electrical Planning and Installation
Most outdoor sauna installation projects require dedicated electrical circuits, especially for electric heaters rated 6–9 kW. This phase demands professional expertise to meet code requirements and ensure safe, reliable operation.
Electric sauna heaters draw heavy continuous loads. A 6 kW heater operating at 240V pulls 25 amps, requiring a 30-amp circuit with appropriate wire gauge and overcurrent protection. Larger 9 kW heaters need 40-amp circuits.
Circuit Requirements by Heater Size
- 4.5 kW heater: 20-amp circuit, 12-gauge wire
- 6 kW heater: 30-amp circuit, 10-gauge wire
- 7.5 kW heater: 35-amp circuit, 8-gauge wire
- 9 kW heater: 40-amp circuit, 8-gauge wire
All installations must comply with the National Electrical Code, which specifies minimum clearances, grounding requirements and acceptable wiring methods for high-heat appliances. Hire a licensed electrician familiar with sauna installations to run the circuit from your main panel to a disconnect box mounted within sight of the sauna.
Underground wiring typically follows the same trench as your foundation drainage. Bury UF-B cable at the depth required by local code (usually 18–24 inches) inside schedule-40 PVC conduit for added protection. Surface the conduit at both ends, terminating at your main panel and at a weatherproof disconnect near the sauna.
Wood-burning heater installations skip heavy electrical work but require spark arrestors, chimney clearances and noncombustible floor protection. Check local fire codes and homeowner insurance requirements before choosing wood heat. A dedicated changing room often proves especially valuable with wood-burning setups, giving you space to store kindling, tend the fire and keep ash away from the hot room.
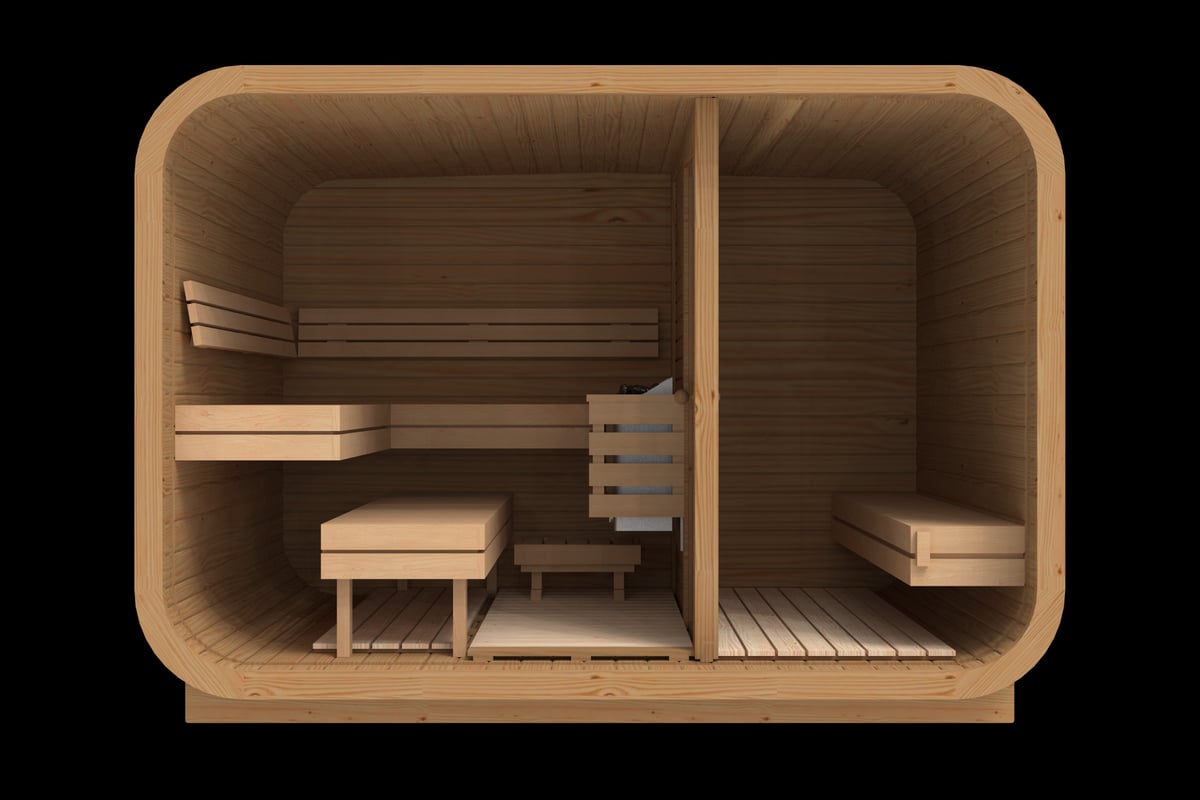
The RecoSauna Comfort Square Sauna 3.0 × 2.3 m in Thermowood includes a 1-meter changing room that works beautifully with either electric or wood-burning heaters, adding privacy and practical storage without enlarging the footprint dramatically.
Permit Requirements and Inspections
Outdoor sauna installation often triggers permit requirements, though rules vary widely by jurisdiction. Treating permits as optional risks fines, project delays and complications when you sell your home.
Common permit triggers:
- Electrical work (nearly universal requirement)
- Structures over 120 square feet
- Permanent foundations
- Plumbing connections (outdoor showers, water lines)
- Setback variances
Contact your local building department early in the planning phase. Describe your project dimensions, foundation type, heater choice and electrical requirements. Most departments provide permit checklists and fee schedules online or over the phone.
Expect two or three inspections for a typical outdoor sauna installation. The electrical rough-in inspection happens after trenching and conduit installation but before backfilling. The final electrical inspection occurs once the heater is wired and the disconnect box is mounted. Some jurisdictions also inspect the foundation before you set the sauna.
Building Science Corporation's technical guidance on sauna assemblies addresses vapor control and insulation strategies that meet code requirements in humid climates.
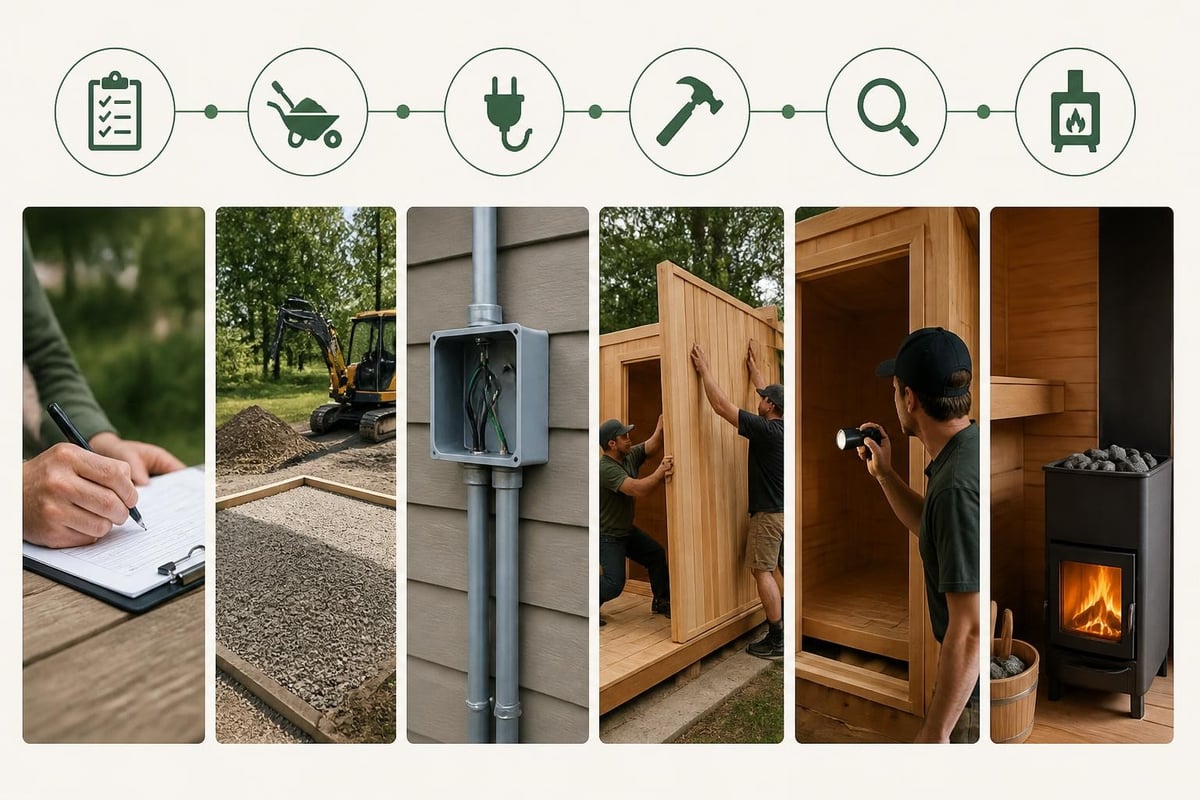
Timeline from Permit to First Fire
| Phase | Duration | Key Tasks |
|---|---|---|
| Permit application | 1–3 weeks | Submit drawings, pay fees, await approval |
| Site prep and foundation | 3–7 days | Grade, excavate, pour or set piers |
| Electrical rough-in | 1–2 days | Trench, run conduit, install disconnect |
| Sauna assembly | 1–3 days | Assemble walls, roof, door, benches |
| Electrical finish | 1 day | Wire heater, install controls |
| Final inspection | 1 week | Schedule, pass, receive certificate |
| Heater seasoning | 2 hours | Low-heat burn-in, verify operation |
Rushing through inspections rarely saves time. Inspectors who spot code violations will issue correction notices that delay your final approval and add rework costs.
Assembly Process and Best Practices
Modern prefabricated outdoor saunas use tongue-and-groove wall systems that two people can assemble in a weekend. Quality manufacturers ship detailed instructions, pre-cut components and all necessary hardware.
Unpack everything before you start. Verify wall panels, roof sections, door assemblies, bench components and trim pieces against the packing list. Inspect for shipping damage and report issues immediately.
Step-by-Step Assembly Sequence
- Prepare the foundation surface: Sweep clean, verify level, install moisture barrier
- Lay the floor frame: Assemble pressure-treated base, check square with diagonal measurements
- Install first wall course: Start at one corner, interlock tongue-and-groove edges
- Build walls to full height: Alternate corners to maintain plumb and square
- Install door frame and lintel: Follow manufacturer's specs for header support
- Attach roof panels: Secure to top wall course, verify overhang on all sides
- Install roofing membrane and shingles: Start at eaves, overlap courses properly
- Hang door and install glass: Adjust hinges for smooth operation and tight seal
- Mount benches: Secure brackets to wall studs, level front-to-back
- Attach trim and exterior hardware: Complete door handle, vent covers, threshold
Solid wood expands and contracts with humidity changes. Leave the recommended expansion gaps (typically 1/8 to 1/4 inch) at wall corners and where roof panels meet. Driving screws or nails too tight restricts movement and causes splitting.
Work on dry days when possible. Rain during assembly complicates leveling, causes temporary wood swelling and delays roofing work. If weather turns, protect open walls with tarps secured at the top to shed water.
Heater Installation and Ventilation Setup
Your heater defines the sauna experience. Electric models deliver consistent heat and precise temperature control while wood-burning stoves create the traditional crackling-fire ambiance many sauna enthusiasts prefer.
Electric heater installation starts with mounting the unit to the wall per manufacturer's specifications. Most heaters attach to wall studs behind non-combustible backer board, with minimum clearances to benches, ceilings and wood surfaces. Route the cable through the wall and into the heater junction box, following the wiring diagram exactly.
Electric heater installation checklist:
- Non-combustible wall protection (cement board or similar)
- Proper clearances: 6–8 inches from ceiling, 4–6 inches from side walls
- Heater secured to wall studs with lag bolts
- Sauna stones loaded per manufacturer's guidance
- Control panel mounted outside hot room (unless rated for sauna use)
- Wiring verified by licensed electrician before energizing
Wood-burning installations demand more planning. Position the stove to maximize heat distribution while maintaining code-required clearances from combustible walls, benches and the door. Install a double-wall chimney through the roof, seal penetrations with a flashed roof jack and cap the chimney with a spark arrestor.
Ventilation ensures fresh air circulation and comfortable humidity levels. The classic Finnish system places a fresh-air inlet near the floor below or behind the heater, allowing cool air to warm as it rises. An exhaust vent on the opposite wall near the ceiling completes the circuit. Some builders prefer passive vents while others install low-voltage exhaust fans controlled by timers.
The EPA's indoor air quality guidance offers moisture-control strategies applicable to sauna ventilation design, particularly in humid climates where mold prevention matters.
Final Details and Pre-Use Inspection
Before lighting your first fire or energizing the heater, walk through a comprehensive pre-use inspection. This final check catches installation errors, verifies code compliance and ensures safe operation.
Pre-use inspection points:
- All electrical connections tight and properly grounded
- Heater guards and stone retainers secure
- Door closes fully and latches smoothly
- Benches stable with no sharp edges or protruding fasteners
- Ventilation openings clear and unobstructed
- Roof sealed with no visible gaps or leaks
- Exterior grade sloped away from walls
- Disconnect box accessible and properly labeled
Run the heater empty (without occupants) for its first cycle. Electric heaters should reach target temperature in 30–45 minutes without tripping breakers or emitting odors beyond the normal off-gassing of new wood and stone. Wood-burning stoves need a gentle break-in fire to cure door gaskets and paint.
Monitor temperature distribution with a quality sauna thermometer mounted at head height on the wall opposite the heater. Proper installations deliver consistent heat from floor to ceiling on the back wall, with a 20–30°F gradient toward the door.
Thermowood saunas excel in year-round outdoor use because the heat-treated wood resists moisture, decay and dimensional change better than untreated pine or cedar. Our square outdoor sauna designs explain why Thermowood construction outperforms alternatives in freeze-thaw climates across the northern United States and Canada.
Seasonal Maintenance and Winterization
Outdoor sauna installation doesn't end when you take your first session. Regular maintenance protects your investment and ensures reliable performance through summer heat and winter cold.
Clean benches and walls monthly during heavy use. Scrub with a stiff brush and warm water, avoiding soaps or chemicals that leave residue or create off-gassing during heating. Rinse thoroughly and leave the door open after cleaning to promote drying.
Quarterly maintenance tasks:
- Inspect roof for damaged shingles or membrane tears
- Clear leaves and debris from roof valleys and behind the sauna
- Check door weatherstripping and replace if compressed or torn
- Tighten any loose bench brackets or trim screws
- Verify heater stones are intact and properly positioned
- Test door latch alignment and adjust if needed
Winter performance in cold climates depends on proper insulation and heater sizing. A well-built sauna maintains comfortable temperatures even when outdoor air drops below zero Fahrenheit, though pre-heat time extends in extreme cold. Budget an extra 15–30 minutes for the sauna to reach 160–180°F when ambient temperatures fall below 20°F.
Snow load matters in regions with heavy winter precipitation. Keep the roof clear of deep accumulation, especially wet, heavy spring snow. Most residential saunas handle 40–60 pounds per square foot, but verify the manufacturer's rating and your local snow-load requirements.
Wood-burning heaters need regular ash removal and annual chimney inspection. Creosote buildup in chimneys creates fire hazards, so schedule professional cleaning if you use your wood-fired sauna more than twice weekly.
Accessory Integration and Comfort Upgrades
Thoughtful accessories elevate outdoor sauna installation from functional to exceptional. Lighting, sound systems, outdoor showers and cold-plunge tubs extend your wellness routine beyond the hot room.
LED lighting strips create ambiance without the heat and failure issues of incandescent bulbs. Install waterproof strips along the backrest or under benches, choosing warm color temperatures (2700–3000K) that mimic traditional sauna lighting.
Bluetooth speakers rated for high heat and humidity bring music into the sauna without running additional wiring. Mount them high on the wall opposite the benches and choose models with silicone or stainless-steel enclosures rather than plastic.
Outdoor showers extend the season and add convenience. A simple cold-water line and wall-mounted showerhead attached to the sauna exterior costs less than $300 installed. Plumb it during electrical trenching to avoid a second excavation.
Cold plunges deliver the contrast therapy benefits that complement sauna heat. Alternating between 180°F sauna sessions and 50°F cold water immersion drives circulation, reduces inflammation and amplifies the mental clarity many users seek. Those serious about recovery appreciate a dedicated cold plunge setup alongside their sauna installation.
Popular sauna accessories:
- Bucket and ladle for löyly (steam)
- Thermometer and hygrometer
- Sand timer or waterproof clock
- Headrest cushions
- Essential oil diffusers (compatible with sauna heat)
- Exterior benches or deck seating
- Pathway lighting for nighttime access
Storage for towels, robes and accessories matters more than most first-time buyers realize. Built-in changing rooms solve this elegantly, but even saunas without dedicated vestibules benefit from weatherproof deck boxes positioned nearby.
Building Code and Safety Compliance
Outdoor sauna installation intersects electrical codes, building codes, accessibility standards and fire regulations. Navigating this landscape confidently requires understanding which rules apply to residential accessory structures.
Electrical work must follow NEC requirements for high-heat appliances, including GFCI protection in some jurisdictions, proper wire sizing and adequate overcurrent protection. Sauna heaters installed indoors often require GFCI protection, but outdoor installations in separate structures may not, depending on local amendments.
Safety equipment requirements:
- Smoke detector (required in some jurisdictions)
- Carbon monoxide detector (wood-burning heaters)
- Fire extinguisher (Class A, mounted outside door)
- Emergency disconnect within sight of sauna
- Non-slip flooring or duckboards
- Heater guard (if heater protrudes into bench area)
Accessibility rules rarely apply to single-family residential saunas, but multifamily or commercial installations must meet ADA technical requirements for door width, turning radius and bench height.
Product safety certifications provide assurance that heaters and electrical components meet recognized standards. Look for UL listings when selecting electric heaters, confirming the manufacturer submitted the product for independent testing.
Homeowner's insurance may require notification before you install an outdoor sauna. Some carriers increase premiums or require additional liability coverage, particularly for wood-burning models. Call your agent early in the planning process to avoid coverage gaps or claim denials.
Successful outdoor sauna installation combines careful site selection, code-compliant electrical work, quality materials and attention to seasonal performance factors that matter in North American climates. At RecoSauna, we bring authentic Finnish sauna expertise to every installation conversation, helping you choose the right Thermowood Square Sauna model, plan your foundation, select between electric and wood-burning heat, and create a backyard wellness retreat built to last decades. Ready to start planning your installation? Explore our collection and reach out with your site details for personalized guidance.
Share:
Thermowood Sauna: Why Finnish Builders Choose This Material
Outdoor Sauna for Cold Climate: Build & Enjoy Year-Round